React Native: Android debug APK without development server
By default React Native debug builds require the development server to run, as the server is responsible for providing the JS bundle and the assets in debug mode.
If however, you find yourself in need of a debug APK which can run without the development server, you can manually package the debug bundle along with the generated APK.
There are two ways of accomplishing this:
bundleInDebug
In your app/build.gradle file you should see a large commented out block that explains which settings you can set in the project.ext.react map inside your gradle file:
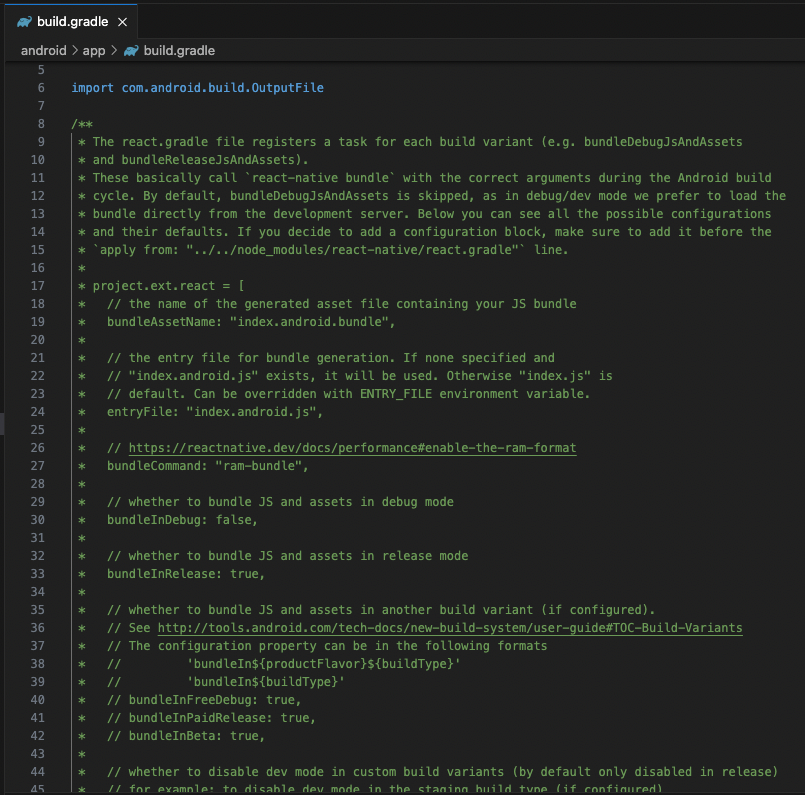
The one that is interesting to us is bundleInDebug: true.
Look for the project.ext.react map (should be right after the commented out block) in your gradle configuration file and add the bundleInDebug: true entry to the map:
project.ext.react = [
    ...

    //ADD THIS LINE
    bundleInDebug: true

    ...
]
This tells gradle to actually bundle the JS code and assets and package those files into the APK instead of serving them up from the dev server.
If you try this out, you will notice that while your app now runs without the dev server it will still display yellowbox warning messages. This is because it is still a development build. If you want to make it a production build, which will have no warnings and will have a minified JS bundle, add the devDisabledInDebug: true entry to the project.ext.react map.
project.ext.react = [
    ...

    bundleInDebug: true

    //ADD THIS LINE
    devDisabledInDebug: true

    ...
]
Note: debug vs release refers to the Android build types, as specified in gradle, whereas development vs production affects the behaviour of the JS bundle.
When you now create an APK with ./gradlew assembleDebug or by running react-native run-android it will be a debug APK, bundled with the minified JS bundle and all assets,capable of running without the dev server.
react-native bundle
If, for some reason, you want or need to manually invoke the react-native bundle command to bundle your JS and your assets, the way to build a development-server-independent APK is as follows:
react-native bundle --dev false --platform android --entry-file index.js --bundle-output ./android/app/build/generated/assets/react/debug/index.android.bundle --assets-dest ./android/app/build/res/react/debug
Let's unpack what is happening there:
The bundle command is simply the command used to bundle the JS and the assets.
--dev false tells it to not bundle it using development mode, i.e. disable warnings and minify the bundle. This corresponds to the devDisabledInDebug: true setting above.
--platform android is self explanatory. Needs to be set, as the default is "ios".
--entry-file index.js is also quite self explanatory. If your entry file is named differently, then you should of course write that name there.
--bundle-output here is where it gets interesting. How do we know the path for the bundle output? In order for gradle to be able to find the bundle it must be in a path where gradle expects it and also be named the way gradle expects it.
This information can be found in the node_modules/react-native/react.gradle file.
Find the line where the variables jsBundleDir and resourcesDir are being defined and assigned values to.
buildDir is the android/app/build directory in your project and targetPath is either debug or release, depending on the build type of your build.
These are the paths where gradle expects to find the JS bundle and the assets to be packaged with the APK.
If, for some reason, you want to override those locations (or any other build settings), do not change them in the react.gradle file directly, but rather in your app level build.gradle file inside the project.ext.react map.